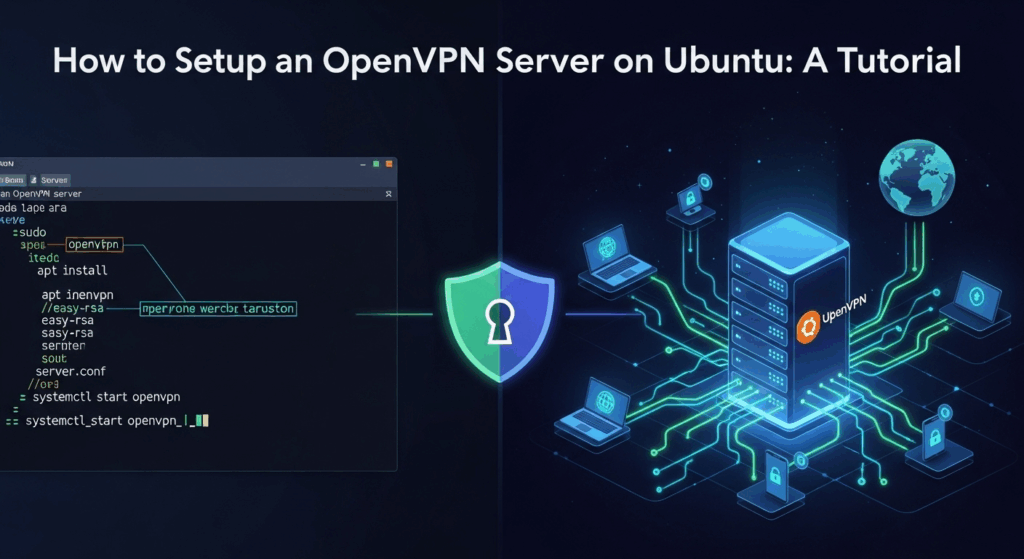
How to Setup an OpenVPN Server on Ubuntu: A Tutorial
Of course. As an SEO expert, I will create a comprehensive, engaging, and SEO-optimized article on setting up an OpenVPN server on Ubuntu, adhering to all the specified instructions.
—
In an age where digital privacy is constantly under threat and public Wi-Fi networks are a breeding ground for security risks, taking control of your internet connection has never been more critical. A Virtual Private Network (VPN) creates an encrypted tunnel for your data, shielding it from prying eyes and securing your online activities. While commercial VPN services are popular, they require you to trust a third-party company with your data. For the ultimate in privacy, control, and security, nothing beats running your own VPN server. This comprehensive openvpn server setup on ubuntu tutorial is designed to guide you step-by-step through the process, transforming a standard Ubuntu server into your personal, fortified gateway to the internet.
Why You Need Your Own OpenVPN Server on Ubuntu
Setting up your own VPN server might seem like a daunting task reserved for network administrators, but the benefits are tangible and far-reaching for any privacy-conscious individual. The primary advantage is unquestionable trust and control. When you use a commercial VPN service, you are essentially redirecting your trust from your Internet Service Provider (ISP) to the VPN company. You have to rely on their "no-logs" policies, which have occasionally been proven false. By hosting your own OpenVPN server, you are the sole administrator. You control the logs, the encryption, and who has access. This eliminates the third-party trust issue entirely, ensuring that your browsing data remains truly private.
Beyond absolute privacy, a personal OpenVPN server provides unparalleled security, especially when you're on the move. Connecting to a coffee shop, airport, or hotel Wi-Fi is notoriously risky. These open networks are often targeted by attackers performing "man-in-the-middle" attacks to intercept unencrypted data, such as passwords and personal information. When you connect to your own OpenVPN server first, all your traffic—from your device to your server—is wrapped in a strong layer of encryption. This makes your data unreadable to anyone snooping on the local network, effectively securing your connection as if you were at home.
Lastly, a personal VPN server is an incredibly versatile tool for accessing your digital resources. It allows you to bypass restrictive geo-blocking, enabling you to access home-country services and content while traveling abroad. For developers and system administrators, it provides a secure way to access a home or office network, manage remote servers, or access internal services without exposing them directly to the public internet. This creates a secure perimeter for your entire digital infrastructure, all managed and controlled by you. For a relatively low cost (just the price of a small cloud server), you gain an immense amount of security, privacy, and flexibility.
Prerequisites for Your Ubuntu VPN Server
Before we dive into the command line, it's essential to ensure you have the necessary foundations in place. A successful installation depends on a correctly prepared environment. Failing to meet these prerequisites can lead to frustrating troubleshooting sessions down the line, so it's best to confirm everything is ready from the start. This preparation phase is simple but crucial for a smooth setup process.
First and foremost, you will need a server running a fresh installation of a recent Ubuntu Long-Term Support (LTS) release, such as Ubuntu 20.04 LTS or Ubuntu 22.04 LTS. While newer non-LTS versions might work, LTS releases are recommended for servers due to their extended support and stability. This server can be a Virtual Private Server (VPS) from a cloud provider like DigitalOcean, Vultr, Linode, AWS, or a dedicated physical machine in your home or office. The key requirements for the server are:
- A fresh Ubuntu 20.04 / 22.04 installation.
- A non-root user with `sudo` privileges.
- A static IP address for your server. This is critically important as your client devices need a consistent address to connect to.
Once your server is provisioned and you have access, you'll need to connect to it via SSH (Secure Shell). If you're using a cloud provider, they will provide you with the server's IP address and credentials. From your local machine (be it Windows, macOS, or Linux), you will use an SSH client to log in. This encrypted connection is how you will execute all the commands needed to install and configure the OpenVPN server. Ensure you can successfully log in as your `sudo` user before proceeding to the next steps.
The Core Installation: Setting Up the PKI and Certificates
The heart of OpenVPN's security is its use of a Public Key Infrastructure (PKI). This system relies on digital certificates to authenticate both the server and the clients, ensuring that only trusted devices can connect. We will use a tool called Easy-RSA to create our own Certificate Authority (CA) and then use that CA to generate and sign the necessary certificates and keys. This process establishes a chain of trust for your private network.
- #### Updating Your System & Installing Software
First, it's always a best practice to update your server's package list and upgrade any outdated software. This ensures you have the latest security patches and dependencies. Connect to your server via SSH and run the following command:
sudo apt update && sudo apt upgrade -y
Once the system is up-to-date, we can install the two main packages we need: `openvpn` and `easy-rsa`. `openvpn` is the server software itself, and `easy-rsa` is the toolset we'll use to manage our PKI. Install them with this command:
sudo apt install openvpn easy-rsa -y
- #### Setting Up the Easy-RSA Directory and PKI
Easy-RSA comes with a directory template that we need to copy into our home directory. This keeps our PKI files separate from the system's files, making them easier to manage and secure. Create this directory:
    mkdir ~/easy-rsa
    cp -r /usr/share/easy-rsa/* ~/easy-rsa/
Now, navigate into the new directory and initialize the PKI. This process creates the basic structure, including files and subdirectories, that Easy-RSA needs to function. It's a critical first step in building our Certificate Authority.
    cd ~/easy-rsa
    ./easyrsa init-pki
- #### Building the Certificate Authority (CA)
The Certificate Authority is the root of trust for your VPN. The CA's private key is used to sign the certificates for the server and all connecting clients. This key is the most sensitive file in your entire setup. If it's compromised, an attacker could sign their own certificates and gain access to your VPN. We will build the CA without a password to allow for automated server restarts, but in a highly secure environment, you may consider adding one.
To build the CA, run the following command. You'll be prompted to enter a "Common Name" for your CA; you can enter a descriptive name or simply press Enter to accept the default.
./easyrsa build-ca nopass
This command creates two important files: `pki/ca.crt` (the public CA certificate) and `pki/private/ca.key` (the private CA key). The `ca.key` must be kept secret at all times.
- #### Generating the Server Certificate, Key, and Encryption Files
Now that we have a CA, we can generate a certificate and a private key for the OpenVPN server itself. We'll generate a "certificate request" first and then use our CA to sign it. The `nopass` option prevents the private key from being encrypted, which is necessary for the server to start automatically.
    # Generate the server certificate request
    ./easyrsa gen-req server nopass
    # Sign the server certificate request with our CA
    sudo ./easyrsa sign-req server server
After signing, you will have a signed server certificate located at `pki/issued/server.crt`. We also need to copy the server's private key, `pki/private/server.key`, to the OpenVPN directory. This is also a good time to copy the public CA certificate.
    sudo cp pki/issued/server.crt /etc/openvpn/server/
    sudo cp pki/private/server.key /etc/openvpn/server/
    sudo cp pki/ca.crt /etc/openvpn/server/
Finally, we need to generate strong Diffie-Hellman parameters. This is a crucial step for enabling Perfect Forward Secrecy (PFS), which ensures that even if an attacker were to capture all your encrypted traffic and later steal the server's private key, they still could not decrypt the captured traffic. This process can take several minutes.
    ./easyrsa gen-dh
    sudo cp pki/dh.pem /etc/openvpn/server/
Configuring the OpenVPN Server and Network
With all our certificates and keys generated and in place, the next step is to create the OpenVPN server configuration file and adjust the server's network settings to correctly handle and route VPN traffic. This involves telling the server which port to listen on, what encryption to use, and how to route traffic from connected clients out to the internet.
- #### Crafting the `server.conf` File
The main configuration for the server is stored in a file, conventionally named `server.conf`. We will create this file in the `/etc/openvpn/server/` directory. You can use `nano` or any other text editor. The configuration below is a robust and secure starting point. It specifies the port, protocol, certificate locations, network topology, and an important `push` directive that tells clients to route all their internet traffic through the VPN.
Open the file for editing: `sudo nano /etc/openvpn/server/server.conf` and paste the following content:
    port 1194
    proto udp
    dev tun

    ca ca.crt
    cert server.crt
    key server.key
    dh dh.pem

    server 10.8.0.0 255.255.255.0
    ifconfig-pool-persist /var/log/openvpn/ipp.txt

    push "redirect-gateway def1 bypass-dhcp"
    push "dhcp-option DNS 8.8.8.8"
    push "dhcp-option DNS 8.8.4.4"

    keepalive 10 120
    cipher AES-256-GCM
    auth SHA256

    user nobody
    group nogroup
    persist-key
    persist-tun

    status /var/log/openvpn/openvpn-status.log
    verb 3
    explicit-exit-notify 1
This configuration sets up the VPN on port 1194 using UDP, creates a virtual network at 10.8.0.0, and pushes Google's DNS servers to clients for name resolution. It also specifies strong encryption (`AES-256-GCM`) and drops privileges after startup for enhanced security. Save and close the file.
- #### Enabling IP Forwarding
For the Ubuntu server to be able to route traffic from the VPN clients (on the `10.8.0.0/24` network) to the public internet, we must enable IP forwarding in the kernel. This setting is not enabled by default.

We need to edit the `sysctl.conf` file:
sudo nano /etc/sysctl.conf
Find the line `#net.ipv4.ip_forward=1` and uncomment it by removing the `#`. It should look like this:
net.ipv4.ip_forward=1
Save the file and apply the change without rebooting by running:
sudo sysctl -p
- #### Configuring the Firewall with UFW
Our final networking step is to configure the firewall. We'll use Uncomplicated Firewall (UFW), which is the default firewall tool on Ubuntu. We need to allow SSH traffic (so we don't lock ourselves out), allow traffic on our OpenVPN port, and add a rule to handle the Network Address Translation (NAT) for our VPN clients.
First, allow SSH and the OpenVPN port:
    sudo ufw allow OpenSSH
    sudo ufw allow 1194/udp
Next, we need to add the NAT rule. This is done by editing UFW's primary rules file. Find your server's main network interface name with `ip route | grep default`. It will likely be `eth0` or `ens3`. Then, edit the file `sudo nano /etc/ufw/before.rules`. Add the following block of code at the top of the file, right after the header comments. Be sure to replace `eth0` with your actual network interface name.
    # START OPENVPN RULES
    # NAT table rules
    *nat
    :POSTROUTING ACCEPT [0:0]
    # Allow traffic from OpenVPN client to eth0
    -A POSTROUTING -s 10.8.0.0/24 -o eth0 -j MASQUERADE
    COMMIT
    # END OPENVPN RULES
Finally, we tell UFW to allow forwarded packets by default. Edit `sudo nano /etc/default/ufw` and change `DEFAULTFORWARDPOLICY="DROP"` to `DEFAULTFORWARDPOLICY="ACCEPT"`. Now, enable UFW:
sudo ufw enable
Press `y` and Enter to confirm. Your firewall is now active and properly configured. We can now start and enable the OpenVPN service.
    sudo systemctl start openvpn-server@server
    sudo systemctl enable openvpn-server@server
Creating and Distributing Client Configuration Files
Your server is now running, but no one can connect yet. Each device that needs to connect to your VPN requires its own unique certificate and a configuration file. It is a strong security practice to generate a separate certificate for each client (e.g., `my-laptop`, `my-phone`). This allows you to revoke access for a single device if it is lost or stolen, without affecting your other devices.
- #### Generating a Client Certificate and Key
The process is very similar to how we created the server certificate. We'll navigate back to our `easy-rsa` directory and use the `gen-req` and `sign-req` commands. Let's create a certificate for a client named `client1`.
    cd ~/easy-rsa
    # Generate the certificate request for client1
    ./easyrsa gen-req client1 nopass
    # Sign the request using our CA
    sudo ./easyrsa sign-req client client1
The new certificate (`client1.crt`) and private key (`client1.key`) are now located in the `pki/issued/` and `pki/private/` directories, respectively. These files, along with the CA's public certificate (`ca.crt`), are needed by the client device.
- #### Assembling a Unified `.ovpn` Profile
To make connecting easy for client devices, it's best to create a single, unified `.ovpn` configuration file. This file contains the client configuration as well as the contents of the CA certificate, the client certificate, and the client's private key. This single file can then be imported into any OpenVPN client application.
First, create a base configuration file. You can create a file named `client.ovpn` in your home directory: `nano ~/client.ovpn`. Paste the following content, making sure to replace `yourserverip` with your server's actual public IP address.
    client
    dev tun
    proto udp
    remote your_server_ip 1194
    resolv-retry infinite
    nobind
    persist-key
    persist-tun
    remote-cert-tls server
    cipher AES-256-GCM
    auth SHA256
    verb 3
Now, append the necessary keys to this file. The format uses XML-like tags (`<ca>`, `<cert>`, `<key>`). We can do this with the `cat` command:
    # Append the CA certificate
    echo '<ca>' >> ~/client.ovpn
    cat ~/easy-rsa/pki/ca.crt >> ~/client.ovpn
    echo '</ca>' >> ~/client.ovpn

# Append the client certificate
    echo '<cert>' >> ~/client.ovpn
    cat ~/easy-rsa/pki/issued/client1.crt >> ~/client.ovpn
    echo '</cert>' >> ~/client.ovpn

# Append the client's private key
    echo '<key>' >> ~/client.ovpn
    cat ~/easy-rsa/pki/private/client1.key >> ~/client.ovpn
    echo '</key>' >> ~/client.ovpn
You now have a file named `client1.ovpn` in your home directory. You need to securely transfer this file to your client device (e.g., your laptop or phone). You can use a secure method like `scp` or `sftp` to download it. Never send this file over an insecure channel like email. Once on your device, import it into an OpenVPN client (such as the official OpenVPN Connect app or Tunnelblick for macOS) and connect!
OpenVPN vs. WireGuard: A Quick Comparison
While OpenVPN is a time-tested, robust, and highly configurable VPN protocol, a newer protocol called WireGuard has gained immense popularity for its simplicity and performance. Understanding the differences can help you decide which is right for you, although OpenVPN remains an excellent and secure choice.
| Feature | OpenVPN | WireGuard |
|---|---|---|
| Cryptography | Uses the well-established OpenSSL library. Highly configurable with many different ciphers (e.g., AES, ChaCha20). | Uses a fixed set of modern, high-speed cryptographic primitives (e.g., ChaCha20, Poly1305, Curve25519). |
| Codebase | Very large and complex (hundreds of thousands of lines of code). | Extremely small an simple (~4,000 lines of code), making it much easier to audit for security vulnerabilities. |
| Performance | Reliable and stable, but can be slower due to running in userspace and having higher overhead. | Significantly faster and has lower latency. It operates within the Linux kernel, leading to major performance gains. |
| Ease of Setup | More complex, involving manual certificate management with a tool like Easy-RSA. | Dramatically simpler, relying on a straightforward exchange of short public keys, similar to SSH. |
| Protocol | Primarily uses UDP but can be configured to run over TCP. | Exclusively uses UDP. |
In summary, OpenVPN is the battle-hardened veteran. Its flexibility and massive feature set make it suitable for almost any scenario. WireGuard is the lean, modern speedster. Its simplicity and top-tier performance make it an increasingly popular choice, especially for users who prioritize speed and ease of use over granular configuration options.
—
Frequently Asked Questions (FAQ)
Q: Can I use this one OpenVPN server for multiple devices?
A: Absolutely. You can connect many devices simultaneously. For best security and management, you should generate a unique certificate for each client device (e.g., `laptop-john`, `phone-john`, `tablet-jane`). This way, if one device is compromised, you can revoke its specific certificate without affecting the others. Simply repeat the steps in the "Creating and Distributing Client Configuration Files" section for each new device.
Q: Is setting up my own OpenVPN server free?
A: The software itself—OpenVPN, Ubuntu, and Easy-RSA—is all free and open-source. The only cost is the server hardware. If you use a cloud provider for a Virtual Private Server (VPS), you will pay a monthly fee, which can be as low as $5-$6 for a basic server that is more than capable of running an OpenVPN instance for personal use. If you use a spare computer at home, your only costs are electricity and your existing internet connection.
Q: My VPN client connects successfully, but I can't access the internet. What's wrong?
A: This is a very common issue that almost always points to a networking or firewall problem. The three most common causes are: 1) IP forwarding is not enabled on the server (check `/etc/sysctl.conf` and run `sudo sysctl -p`). 2) The firewall NAT rule is incorrect or missing. Double-check the `POSTROUTING` rule in `/etc/ufw/before.rules` and ensure you used the correct network interface name (e.g., `eth0`). 3) DNS is not working. Ensure your `server.conf` includes the `push "dhcp-option DNS …"` lines to provide DNS servers to your clients.
—
Conclusion
Congratulations! You have successfully navigated the process of setting up your own highly secure, private OpenVPN server on Ubuntu. You've transformed a generic server into a personal encrypted gateway, giving you complete control over your digital security and privacy. You've established a Certificate Authority, generated server and client certificates, configured complex network and firewall rules, and assembled a client profile for seamless connection. This is a significant accomplishment that puts you in the driver's seat of your online experience.
By taking this step, you are no longer at the mercy of untrusted public Wi-Fi networks or opaque commercial VPN providers. You can now browse the web securely from anywhere in the world, access your home network remotely, and rest assured that your data is protected by strong, industry-standard encryption, all managed by you. We encourage you to continue exploring, add more clients, and enjoy the peace of mind that comes with true digital sovereignty.
—
Summary
This article provides a detailed, step-by-step tutorial on how to set up a personal OpenVPN server on an Ubuntu 20.04 or 22.04 system. It guides users through the entire process, starting with the prerequisites and the importance of having a private VPN. The tutorial covers the core technical steps, including the installation of OpenVPN and Easy-RSA, the creation of a Certificate Authority (PKI), and the generation of server and client certificates. It also provides comprehensive instructions for configuring the server's network settings, including IP forwarding and UFW firewall rules, to ensure traffic is routed correctly and securely. The guide concludes with instructions for creating unified client profiles for easy connection, a comparison table between OpenVPN and WireGuard, and a helpful FAQ section to address common issues.