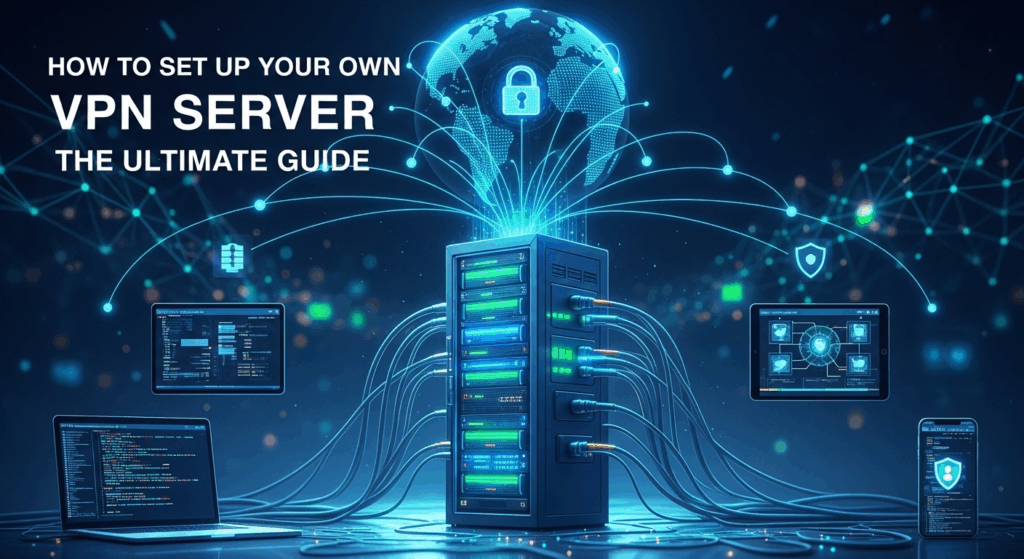
How to Set Up Your Own VPN Server: The Ultimate Guide
In an era where digital privacy is no longer a given but a privilege, taking control of your internet connection has become more important than ever. While commercial VPN services offer a convenient solution, they require you to place your trust in a third-party company's logging policies and security infrastructure. For those seeking the ultimate in privacy, control, and performance, there is a superior alternative. This ultimate guide will walk you through exactly how to set up your own VPN server, empowering you to become the master of your digital domain and browse the web with unparalleled security and freedom.
Why Set Up Your Own VPN Server? The Case for Control
The commercial VPN market is saturated with providers all claiming to be the fastest, most secure, and most private. However, a significant portion of their business model relies on marketing and trust. When you use a commercial VPN, you are rerouting your entire internet traffic through a server owned and operated by a for-profit company. You have to trust their "no-logs" policy, trust that their servers haven't been compromised, and accept that thousands of other users are sharing the same IP address, which can lead to slow speeds and websites blocking you.
Setting up your own VPN server fundamentally shifts this dynamic. Instead of trusting an anonymous company, you place your trust in a platform of your choosing—either a reputable cloud infrastructure provider like DigitalOcean or your own hardware at home. You become the administrator. This means you have absolute control over the server's configuration, you decide who has access, and most importantly, you can guarantee that no logs of your activity are being kept because you control the logging policies yourself. This level of control is something a commercial service can never truly offer.
Beyond the significant privacy advantages, a personal VPN offers tangible benefits in performance and functionality. You won't be sharing your server's bandwidth with hundreds or thousands of other users, meaning your connection speed is often limited only by the server's network link and your own internet connection. This makes it ideal for data-intensive tasks. Furthermore, because you have a unique, dedicated IP address that isn't on the public blacklists used to block commercial VPNs, you'll have a much more reliable experience accessing streaming services and other region-locked content.
Unparalleled Privacy and No True Logs
The most compelling reason to run your own VPN is the guarantee of privacy. Commercial VPN providers often operate under complex legal jurisdictions, and their "no-logs" policies can be difficult to verify. There have been instances where "no-log" VPNs have provided user data to law enforcement, proving their claims were misleading. When you are the sole administrator of your VPN server, you are the only one with the keys to the kingdom.
You configure the server software, and you can ensure that activity logging is completely disabled. The only data that exists is the operational information required for the service to run, which you control. This eliminates the risk of a third-party company monetizing your browsing data, suffering a data breach that exposes your activity, or complying with a government request for information you thought was private. It's the purest form of a "no-logs" policy because you enforce it yourself.
Superior Cost-Effectiveness and Flexibility
At first glance, a $5 per month fee for a cloud server might seem comparable to a budget commercial VPN plan. However, the value proposition becomes clear when you consider device limits and performance. Most commercial VPNs limit the number of simultaneous connections, often to 5 or 6 devices. If you have a family or a large number of gadgets (laptops, phones, tablets, smart TVs), you'll quickly hit this limit.
A personal VPN server has no artificial limits on simultaneous connections. You can create as many user profiles as you need and connect all your devices at once without any extra cost. The only limitation is the server's hardware capacity, and a basic cloud server can easily handle the traffic of a typical household. This makes a personal VPN a far more scalable and cost-effective solution in the long run, especially for tech-savvy families or individuals with extensive device ecosystems.
Fend Off Public Wi-Fi Dangers
Using public Wi-Fi at cafes, airports, or hotels is notoriously risky. These networks are often unsecured, making it easy for malicious actors on the same network to intercept your data through "man-in-the-middle" attacks. A VPN encrypts your connection, creating a secure tunnel to the internet and protecting you from these local network threats.
While any VPN can offer this protection, using your own server provides an added layer of assurance. You know exactly where your data is going—to your own trusted server—and you aren't sharing an IP address with potentially malicious users on a commercial VPN service. This makes your connection both secure from local eavesdroppers and isolated from the "bad neighbor" effect common on public VPN servers, ensuring a clean and secure browsing experience on any public network.
Choosing Your Platform: Cloud vs. At-Home Hardware
Before you can set up your VPN, you must make a foundational decision: where will your server live? There are two primary paths, each with distinct advantages and disadvantages. You can either rent a Virtual Private Server (VPS) from a cloud provider or set up a server on a physical device you own at home, such as a Raspberry Pi.
This choice depends on your technical comfort level, budget, and primary use case. The cloud VPS option is generally faster to deploy, offers superior network performance, and requires less physical maintenance. It's an excellent choice for beginners and those who want a high-performance, "always-on" VPN they can access from anywhere. The at-home option, on the other hand, appeals to hobbyists and those who want complete physical control over their hardware, with the primary cost being the initial hardware purchase rather than a recurring monthly fee.
Ultimately, both paths lead to a fully functional and private VPN. The cloud method prioritizes convenience and performance, while the at-home method prioritizes physical control and a different cost structure. Consider your home internet's upload speed carefully if you are leaning towards the at-home option, as this will be the primary bottleneck for your VPN's performance when you are away from home.
The Cloud VPS (Virtual Private Server) Option
A VPS is a slice of a powerful physical server that you rent from a cloud hosting company. Providers like DigitalOcean, Vultr, Linode, and AWS offer affordable Linux-based VPS instances starting at around $4-6 per month. For this small fee, you get a fully functional server with a dedicated IP address, high-speed internet connection, and professional-grade uptime. This is the most popular and recommended method for most users.
The main advantage of a cloud VPS is the professional-grade network infrastructure. These data centers have incredibly fast and reliable internet connections, often 1 Gbps or more. This means your VPN will be very fast, and you can even choose a server location in a different country to bypass geo-restrictions effectively. Setup is also streamlined, as you can deploy a new server with a clean operating system in minutes and use automated scripts to handle the complex VPN configuration. The only real downside is the recurring monthly cost and the need to trust the cloud provider's physical security and privacy practices (though they have no access to your encrypted traffic).
The At-Home Hardware Option (e.g., Raspberry Pi)
For the ultimate in control, nothing beats running a server on hardware you physically own. A low-power, single-board computer like the Raspberry Pi is the perfect candidate for this job. It's inexpensive, consumes very little electricity, and is more than powerful enough to run a VPN server for a family. This method involves a one-time cost for the hardware (Raspberry Pi, SD card, power supply) and no recurring fees.
The primary benefit here is that you control everything, from the hardware to the software. However, this path comes with more technical hurdles. Your VPN's performance will be limited by your home internet's upload speed, which is often much slower than your download speed. You'll also need to configure your home router to forward a specific port to your Raspberry Pi (a process called port forwarding), which can be tricky for beginners. Finally, your VPN will be unavailable if your home loses power or internet connectivity. This option is best for hobbyists who enjoy tinkering and whose primary use case is securing their traffic while on public Wi-Fi rather than high-speed streaming from abroad.
The Essential Toolkit: Software and Protocols
With your platform chosen, the next step is to select your software. A VPN is built upon a "protocol," which is the set of rules that defines how the secure tunnel is created and how data is encrypted. For years, OpenVPN was the undisputed king, known for its reliability and security. However, a newer, more modern protocol called WireGuard has rapidly gained popularity due to its simplicity, superior performance, and state-of-the-art cryptography.
For most new setups today, WireGuard is the recommended choice. It has a much smaller codebase, making it easier to audit for security vulnerabilities, and it offers significantly faster connection speeds and better battery life on mobile devices compared to OpenVPN. It is designed to be simple to configure and incredibly performant.
Fortunately, you don't need to be a Linux guru to install and configure these complex protocols. The community has developed fantastic open-source automation scripts that do all the heavy lifting for you. Scripts like Algo VPN and PiVPN provide a simple, interactive wizard that asks you a few basic questions and then automatically installs and configures a secure VPN server in minutes. These tools make the process accessible to almost anyone.
WireGuard vs. OpenVPN: A Quick Comparison
To help you understand the differences, here is a breakdown of the two leading VPN protocols.
| Feature | WireGuard | OpenVPN |
|---|---|---|
| Speed & Performance | Extremely fast, with low overhead. Noticeably faster connection times. | Reliable but slower. Higher CPU usage and performance overhead. |
| Cryptography | Uses modern, state-of-the-art ciphers (ChaCha20, Poly1305). Not agile. | Uses the well-established OpenSSL library. Highly configurable (agile). |
| Codebase Size | ~4,000 lines of code. Easy to audit and debug. | ~70,000 – 600,000 lines of code (depending on dependencies). Very complex. |
| Configuration | Very simple. Based on exchanging public keys, similar to SSH. | Complex. Requires managing certificates, keys, and extensive config files. |
| Platform Support | Natively in Linux kernel. Apps for Windows, macOS, Android, iOS. | Excellent cross-platform support with apps for almost every OS. |
Step-by-Step Guide: Setting Up a VPN on a Cloud VPS
This section will guide you through setting up a VPN server on a cloud VPS using the popular Algo VPN script. We will use DigitalOcean as the example provider due to its user-friendly interface and affordable pricing. Algo is a set of Ansible scripts that automates the deployment of a personal IPsec/IKEv2 and WireGuard VPN. It's designed for security and ease of use.
Before you begin, you will need a computer running macOS, Linux, or Windows (with WSL – Windows Subsystem for Linux). You will be using the command-line terminal to run the setup script. Don't be intimidated; you'll just be copying and pasting a few commands. The script handles all the complicated configuration automatically.
This process will create a secure, private VPN server that you can connect to from all your devices. The script will generate simple configuration files or QR codes that you can use with the official WireGuard client apps on your phone and computer.
Deploying Your Cloud Server (Droplet)
First, you need to create your server. Go to <a href="https://www.digitalocean.com/" target="_blank" rel="noopener">DigitalOcean's website</a> and create an account. You may need to add a payment method, but a basic server only costs a few dollars a month.
Once your account is set up, follow these steps:
- Click "Create" and then select "Droplets" (a Droplet is DigitalOcean's name for a VPS).
- Choose an Image: Select the latest Ubuntu LTS release (e.g., Ubuntu 22.04 LTS).
- Choose a Plan: Select the "Basic" plan and the cheapest option, which is usually around $4-6/month. This is more than enough for a personal VPN.
- Choose a Datacenter Region: Pick a location that is either geographically close to you for best speeds or in a country you want to access content from.
- Authentication: Select the "Password" option and create a strong root password for your server. Make sure you save this password.
- Click "Create Droplet". In about a minute, your server will be online and you'll be given its public IP address. Copy this IP address.
Installing Algo VPN and its Dependencies
Now, open the terminal on your local computer (not the server). You need to install the software that Algo depends on. The commands are slightly different for macOS and Linux.
For Ubuntu/Debian Linux:
sudo apt update
sudo apt install python3-virtualenv git -y
For macOS (assuming you have Homebrew installed):
brew install python3 git
Next, download Algo from GitHub and navigate into its directory:
git clone https://github.com/trailofbits/algo.git
cd algo
Now create a Python virtual environment and install Algo's Python dependencies into it. This keeps your system clean.
python3 -m virtualenv --python="$(command -v python3)" .env
source .env/bin/activate
python3 -m pip install -r requirements.txt
Running the Algo Setup Wizard
Before running the wizard, you need to tell Algo which users you want to create. Open the `config.cfg` file in a text editor (`nano config.cfg`) and find the `users` section. Add the usernames you want to create:
users:
  - phone
  - laptop
  - tablet
Save and close the file. Now, you can run the setup wizard with a single command:
./algo
The script will ask you a series of questions.
- What provider are you using? Choose "DigitalOcean". It will then ask for an API key. A link will be provided with instructions on how to generate one from your DigitalOcean account dashboard.
- What region do you want to deploy in? Choose the same region where you created your Droplet.
- Do you want to enable DNS adblocking? Answering "Yes" is highly recommended. This will block ads at the server level for all your connected devices.
- The script will ask a few more questions about retaining SSH keys. You can accept the defaults for these.
After you answer the questions, Algo will take over. It will automatically connect to your DigitalOcean account, create the server, install all the necessary software, configure WireGuard and IPsec, harden the server's security settings, and then generate the configuration files for your users. The whole process takes about 10-15 minutes. When it's finished, you will find all the configuration files in a folder named `configs` inside the `algo` directory. You can add these profiles to your devices and connect to your brand-new VPN!
Post-Setup: Security, Maintenance, and Best Practices
Congratulations, you have your own VPN server! However, your work isn't quite finished. Running a server, even one set up by an automated script, comes with the responsibility of basic maintenance. Keeping your server secure and running smoothly requires minimal but important effort.
The most critical maintenance task is keeping the server's software up to date. The Linux operating system and the VPN software itself will receive security patches over time. Applying these updates protects your server from newly discovered vulnerabilities that could be exploited by attackers. This is a simple process that only takes a few minutes every month or so.
Additionally, you'll need to manage your VPN users. As you get new devices or want to grant access to a family member, you'll need to create new user profiles. Conversely, if a device is lost or stolen, it is crucial to immediately revoke its access to your VPN server to prevent unauthorized use. Both Algo and PiVPN provide simple commands for user management.
Keeping Your Server Updated
To update your server, you need to connect to it using SSH (Secure Shell). The command is `ssh root@YOURSERVERIP`. You'll be prompted for the password you created earlier. Once you are logged in, you can update all the software packages by running two simple commands:
sudo apt update
sudo apt upgrade -y
The first command, `apt update`, refreshes the list of available software packages from the official repositories. The second command, `apt upgrade -y`, downloads and installs any available updates. It's a good practice to run these commands at least once a month to ensure your server remains secure. After the updates are installed, it's often a good idea to reboot the server with the command `sudo reboot` to ensure all updates are applied correctly.
User and Client Management
Managing users is straightforward. If you used Algo, you can simply add a new username to your `config.cfg` file and run `./algo update-users`. This will generate the configuration files for the new user without having to redeploy the entire server. To revoke access, you remove them from the `config.cfg` file and run the same command.
If you used an alternative like PiVPN on a Raspberry Pi, user management is done via the command line. You can add a new user (client) with `pivpn add` and you can revoke a user's access with `pivpn revoke`. This command-line interface makes it quick and easy to manage who has access to your private network, ensuring your VPN remains secure and private to only those you trust.
—
Conclusion
Building your own VPN server is an incredibly empowering project that puts you in the driver's seat of your digital privacy. By moving away from commercial providers and taking on the role of administrator, you gain absolute control over your data, enhanced performance, and unmatched flexibility. While it may have once seemed like a task reserved for network engineers, modern tools like Algo VPN and PiVPN have made the process accessible to anyone with a willingness to learn and follow a few steps.
Whether you choose the high-performance convenience of a cloud VPS or the hands-on control of a Raspberry Pi, the end result is the same: a secure, private, and reliable tunnel to the internet that you own and operate. You are no longer just a customer trusting a company's marketing claims; you are the architect of your own secure connection. By investing a small amount of time and money, you can build a powerful tool that will serve you for years to come, protecting your privacy on any network and freeing your access to the global internet.
—
Frequently Asked Questions (FAQ)
Q: Is it legal to set up and use my own VPN server?
A: In the vast majority of countries, yes, it is perfectly legal to set up and use your own VPN server. VPNs are legitimate tools used by corporations and individuals for security and privacy. However, using a VPN to conduct illegal activities is still illegal. Some countries with heavy internet censorship may restrict or ban VPN use, so it's wise to be aware of the laws in your specific location.
Q: How much does it really cost to run a personal VPN?
A: The cost depends on your chosen platform. For a cloud VPS on a provider like DigitalOcean or Vultr, you can expect to pay around $4 to $6 per month for a server that is more than powerful enough. For an at-home server using a Raspberry Pi, there's a one-time hardware cost of roughly $50 to $100, and then the only ongoing cost is the negligible amount of electricity it consumes.
Q: Is my own VPN server faster than a commercial one like NordVPN or ExpressVPN?
A: It can be, especially for your chosen location. Commercial VPN servers are shared by hundreds or thousands of users, which can lead to congestion and slow speeds. Your personal VPN server's resources are dedicated entirely to you. Your speed will be limited by the server's network connection (usually a very fast 1 Gbps on a cloud VPS) and your own internet plan. For a direct connection to your chosen server location, a personal VPN is often significantly faster and more consistent.
Q: Can I still be tracked if I use my own VPN?
A: A VPN primarily hides your IP address from the websites and services you visit. Your traffic is encrypted between your device and your VPN server. However, it does not make you completely anonymous. Your cloud VPS provider will know your identity and payment information, and they can see that you are connecting to your server (though they cannot see the content of your encrypted traffic). Setting up your own VPN is about shifting trust from a VPN company to a cloud infrastructure company, not achieving perfect anonymity.
Q: What is the most difficult part of this process for a beginner?
A: For most beginners, the two biggest hurdles are becoming comfortable with the command-line interface and, for at-home setups, figuring out port forwarding on their specific router model. However, scripts like Algo and PiVPN minimize command-line interaction to just a few copy-paste commands, and there are many online guides for port forwarding available for almost every router.
***
Article Summary
This comprehensive guide, "How to Set Up Your Own VPN Server: The Ultimate Guide," provides a detailed walkthrough for creating a personal VPN for enhanced privacy, security, and control. The article first establishes the "why" behind this project, highlighting the advantages over commercial services, such as guaranteed no-logs policies, cost-effectiveness for multiple devices, and reliable access to geo-restricted content. It then explores the two primary platforms—a cloud-based Virtual Private Server (VPS) for performance and convenience, or at-home hardware like a Raspberry Pi for total physical control. The guide includes a step-by-step tutorial for setting up a VPN on a cloud server using the popular Algo VPN script, as well as a comparison of the leading VPN protocols, WireGuard and OpenVPN. Finally, it covers essential post-setup maintenance, security best practices, and a helpful FAQ section to address common questions, empowering readers to build and manage their own secure gateway to the internet.